7. Comprobaciones
1. Comprobaciones de React
1. Obtener el escudo del ayuntamiento, y colocarlo en src/images
2. Obtener el favicon del ayuntamiento por ejemplo en https://favicon.io/favicon-converter/ y colocarlo en src/images
3. Cambiar el index.html de la carpeta public lo indicado en fondo amarillo
<!DOCTYPE html>
<html lang="en">
  <head>
    <meta charset="utf-8" />
    <link rel="icon" href="%PUBLIC_URL%/favicon_ajuntament.ico" />
    <meta name="viewport" content="width=device-width, initial-scale=1" />
    <meta name="theme-color" content="#000000" />
    <meta
      name="description"
      content="CSV Validator"
    />
    <link rel="apple-touch-icon" href="%PUBLIC_URL%/logo192.png" />
    <!--
      manifest.json provides metadata used when your web app is installed on a
      user's mobile device or desktop. See https://developers.google.com/web/fundamentals/web-app-manifest/
    -->
    <link rel="manifest" href="%PUBLIC_URL%/manifest.json" />
    <!--
      Notice the use of %PUBLIC_URL% in the tags above.
      It will be replaced with the URL of the `public` folder during the build.
      Only files inside the `public` folder can be referenced from the HTML.

      Unlike "/favicon.ico" or "favicon.ico", "%PUBLIC_URL%/favicon.ico" will
      work correctly both with client-side routing and a non-root public URL.
      Learn how to configure a non-root public URL by running `npm run build`.
    -->
    <!--  <title>React App</title> -->
    <title>Ajuntament</title>
  </head>
  <body>
    <noscript>You need to enable JavaScript to run this app.</noscript>
    <div id="root"></div>
    <!--
      This HTML file is a template.
      If you open it directly in the browser, you will see an empty page.

      You can add webfonts, meta tags, or analytics to this file.
      The build step will place the bundled scripts into the <body> tag.

      To begin the development, run `npm start` or `yarn start`.
      To create a production bundle, use `npm run build` or `yarn build`.
    -->
  </body>
</html>
4. Cambiar el fichero package.json , la clave "homepage" a "/CSV"
5. ejecutar npm run build
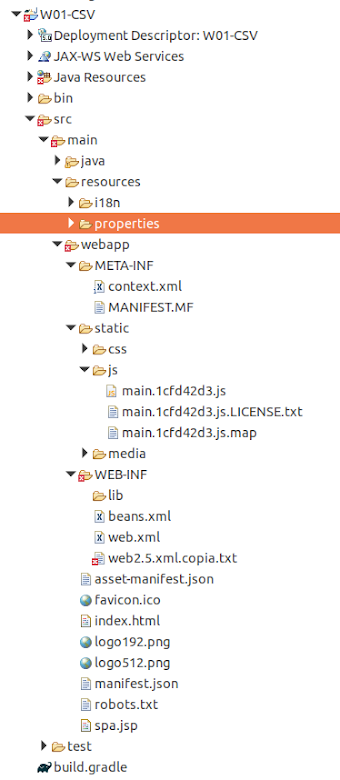
6. Copiar el contenido de la carpeta build de Visual studio dentro de la carpeta src/main/webapp de Eclipse
2. Comprobaciones de Eclipse
1. Verificar que el fichero context.xml de la carpeta src/main/webapp/META-INF contenga los datos correctos marcados en amarillo
<Context>
  <Resource
    name="PostgressGexflowJPAPU"
    auth="Container"
    type="javax.sql.DataSource"
    username="usuario"
    password="password"
    maxTotal="50"
    maxIdle="20"
    maxWait="10000"
    timeBetweenEvictionRunsMillis="180000"
    removeAbandonedOnMaintenance="true"
    removeAbandonedOnBorrow="true"
    driverClassName="org.postgresql.Driver"
    url="jdbc:postgresql://192.168.xxx.xxx:5432/suite_gexflow"/>
</Context>
2. Verificar app.properties de la carpeta src/main/resources/properties
#0. Logging for those who have accessed to get CSVs
log.file=/home/informatica/csv.log
#0. Carpeta on guardar els recusos
resources.folder=/home/informatica/MyResources

#2. SEDIPUALBA
#AYTO
alba.csv.pdf.url          = https://ayuntamiento.sedipualba.es/LAQUESEA
alba.csv.orig.url         = https://ayuntamiento.sedipualba.es/firma/LAQUESEA

#3. SEDE VALIDACIO CSV GEXFLOW
gexflow.csv.url      =https://csv.ayuntamiento.es:19443/CSV

#4. ALFRESCO
#AYTO
alfresco.URL= http://192.168.XXX.XXX:8080/alfresco/cmisatom

alfresco.user=USER
alfresco.password=PASSWORD
3. Verificar dao.properties de la carpeta src/main/resources/properties
#Semicolon separated persistence units
#-------------------------------------------------------------------------------------------------------------------------------------
#PERSISTENCE UNITS AND HOSTS: 0:Control, 1:Postgres Gexflow1, 2:H2 Sicres ORVE, 3:SQL-SERVER Gestio-3 Casdastre, 4:SQL-SERVER Aytos, 5:pg Sicres ORVE, 6: Postgres control local, 7: INE Postgres
#-------------------------------------------------------------------------------------------------------------------------------------
#                 0            1                     2        3                      4                    5        6             7
persistence.units=control_post;PostgressGexflowJPAPU;

#AYTO
persistence.hosts=192.168.0.0;192.168.xxx.xxx;
#                         0    1
persistence.units.active=true;true;
4. Verificar persistence_PostgressGexflowJPAPU_JNDI.properties de la carpeta src/main/resources/properties
#-----------------------------------------------------------------------------
#1. General Properties
persistence.unit.name=            PostgressGexflowJPAPU
persistence.provider.class.name=  org.hibernate.jpa.HibernatePersistenceProvider
jta.datasource.name=              PostgressGexflowJPAPU
#non.jta.datasource=
#mapping.file.names=
#jar.file.urls=
#persistence.unit.root.url

managed.classes=                  openadmin.model.gexflow.edu.basic.Doc;

exclude.unlisted.classes=         true
#shared.cache.mode=
#-----------------------------------------------------------------------------
#Properties not included in datasource
hibernate.dialect=                org.hibernate.dialect.PostgreSQLDialect
hibernate.hbm2ddl.auto=           none
hibernate.show_sql=               true
#-----------------------------------------------------------------------------
5. Encriptar las propiedades
3. Comprobaciones del servidor tomcat
1. Instalar en el servidor si no se han instalado antes
sudo apt-get updatesudo apt-get install libxrender1sudo apt-get install libxtst6sudo apt-get install libxi6 libgconf-2-4
Comentarios
Publicar un comentario